Best Way to Keep Fish Fresh on a Boat
There's nothing quite like the thrill of a successful fishing trip in Florida – the tug on the line, the battle, and finally, bringing a beautiful fish onto the boat. But all that hard work can feel wasted if your prize catch doesn't stay fresh and delicious. The warm Florida air and the hot deck of a boat can quickly turn your prized snapper or redfish into a culinary disappointment. This guide is here to walk you through the very best methods and gear to ensure your fish remains in peak condition from the moment it's caught until it's proudly presented at the cleaning station or carefully packed for the journey home.
Why Immediate Care is Crucial for Fish Freshness
You've landed a gorgeous fish, congratulations! But the clock starts ticking the moment it leaves the water. Understanding what happens to a fish after it's caught, especially in Florida's often balmy environment, is key to appreciating why quick and proper care isn't just a suggestion—it's absolutely essential.
The Science of Spoilage: What Happens After the Catch?
When a fish is caught, it undergoes significant physiological changes. The stress of the fight, the change in environment, and the eventual death all contribute to processes that can rapidly degrade the quality of the flesh. One of the first things that happens is the onset of rigor mortis. This stiffening of the muscles is natural, but how quickly it sets in and how long it lasts can be influenced by temperature and the stress the fish endured. A stressed fish, left to flop around, can burn through its glycogen reserves, leading to a faster and more intense rigor mortis, which in turn can affect texture.
Beyond rigor, the real enemy of freshness is heat. Florida's air and water temperatures are often ideal breeding grounds for bacteria. These microscopic organisms, naturally present on the fish's skin and in its gut, begin to multiply rapidly once the fish is out of its cold aquatic environment. As they grow, they produce enzymes that break down the fish's tissues, leading to the "fishy" odor, slimy texture, and eventual spoilage we all dread. The longer a fish stays warm, the faster these processes accelerate, literally cooking the fish from the inside out in some cases. This is why getting the fish cold, and doing it quickly, is the single most important step you can take.
Beyond Taste: Safety and Quality Concerns
While nobody wants a "fishy" tasting fillet, the concerns go far beyond just culinary enjoyment. Food safety is paramount. Bacteria proliferation, if left unchecked, can lead to foodborne illnesses. Properly chilling your fish immediately and maintaining that cold temperature significantly slows bacterial growth, making your catch safer to eat. Imagine dedicating a full day to offshore fishing, battling a strong mahi-mahi, only to discover later that improper handling turned it into something inedible. It's a truly disappointing experience that can be entirely avoided.
Moreover, the quality of the flesh—its texture, color, and flavor—is directly impacted by how you handle it on the boat. A fish that's kept cold and cared for will have firm, translucent flesh, a clean, mild flavor, and a pleasant aroma. One that's allowed to warm up will become soft, mushy, and acquire that strong, off-putting smell. It's the difference between a gourmet meal and a regrettable experience. Anglers who take pride in their catch know that the care taken on the boat is just as important as the skill used to hook it.
Essential Gear for On-Boat Fish Preservation
Keeping your fish pristine requires more than just good intentions; it demands the right tools and a smart approach. Think of your boat as a mobile seafood processing unit, and these items are your critical instruments.
The Indispensable Cooler: Not All Are Created Equal
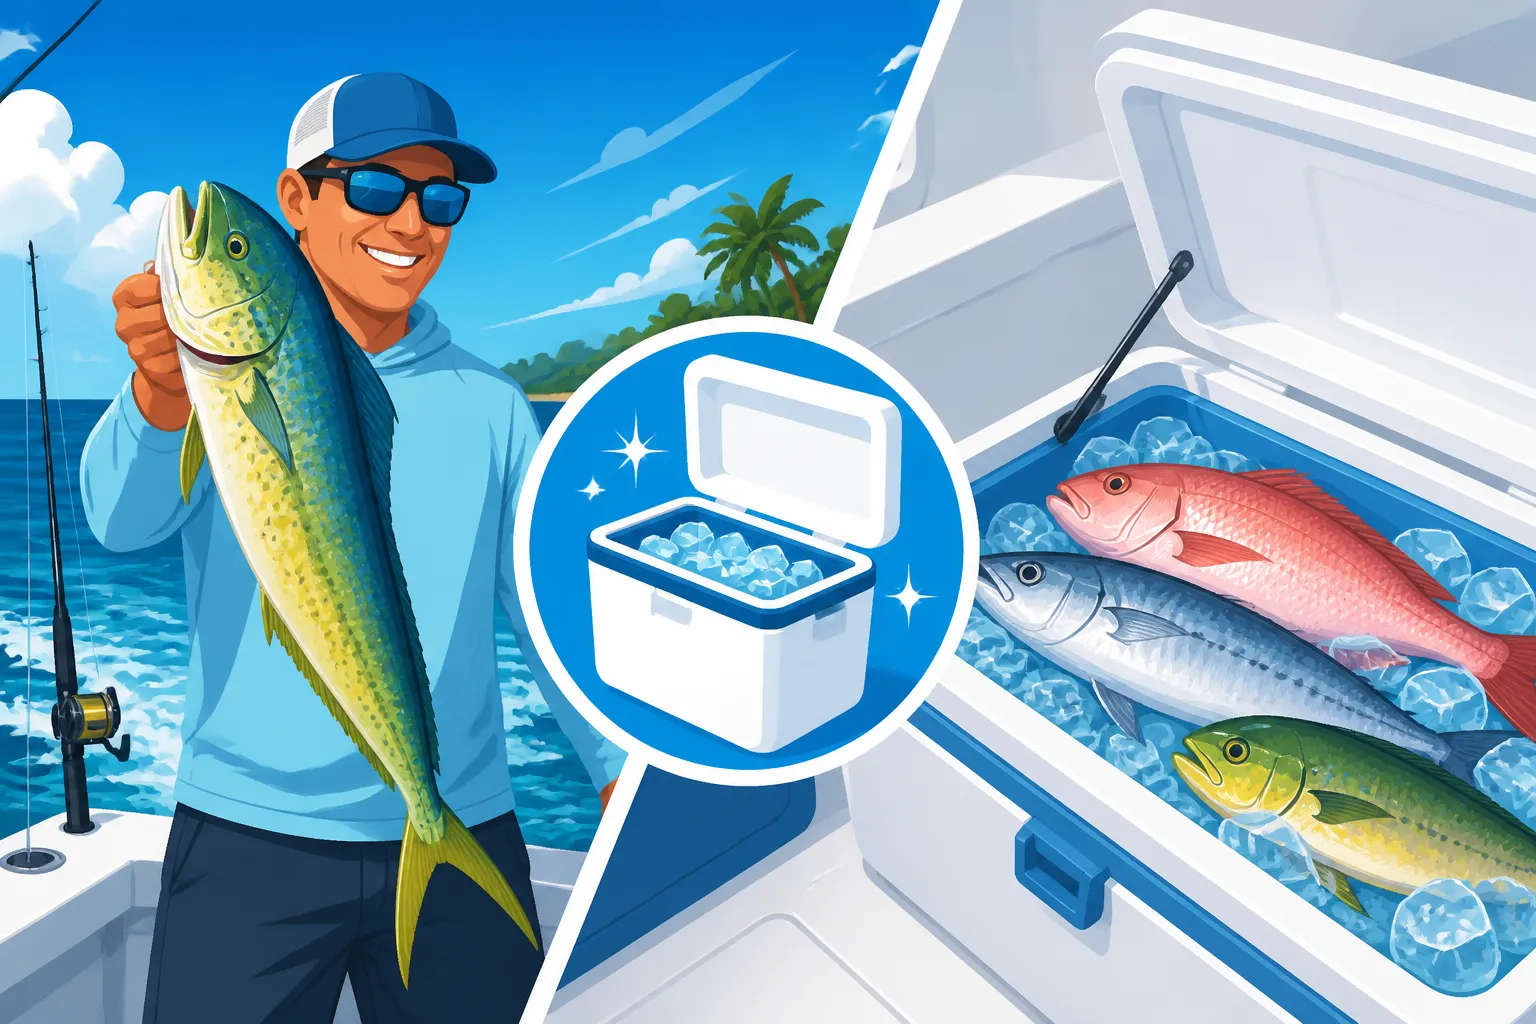
This is the cornerstone of on-boat fish preservation. A good cooler isn't just a box; it's an insulated fortress designed to keep the cold in and the heat out. While any cooler is better than no cooler, investing in a quality one truly makes a difference, especially when fishing for extended periods under the Florida sun.
Heavy-duty, roto-molded coolers are the gold standard. Brands like Yeti, RTIC, and Engel have built reputations on their superior insulation capabilities, often featuring thick walls and airtight seals that can hold ice for days. These are fantastic for serious anglers who spend long hours offshore or want to ensure their prize catches, like a hefty grouper or a prize snapper, stay perfectly chilled. They are rugged, durable, and can withstand the harsh marine environment. For instance, if you're out chasing a Florida Tarpon Fishing Guide or exploring deep waters for a big catch, a robust cooler is non-negotiable.
For shorter trips or smaller vessels, well-insulated soft-sided coolers or kill bags can also be effective. These are lighter, easier to store, and often sufficient for a day's worth of speckled trout or redfish from inshore waters. Regardless of the type, the key is insulation. The thicker the walls and the tighter the seal, the better it will perform.
Pro-tip: Always pre-chill your cooler! Fill it with ice and a little water the night before your trip. This brings the internal temperature down, so your precious fishing ice isn't wasted cooling down a warm cooler.
Ice, Glorious Ice: The Foundation of Freshness
You can have the best cooler in the world, but without ample ice, it's just a fancy storage box. The type and quantity of ice you use are paramount to achieving optimal freshness.
- Block Ice: This is your long-lasting hero. Block ice melts much slower than cubed or crushed ice because it has less surface area exposed to warmer air. It's fantastic for creating a base layer in your cooler or for multi-day trips. However, its large size means it doesn't conform perfectly to the shape of your fish, so its cooling contact isn't always comprehensive.
- Crushed or Cubed Ice: This is your rapid-cooling workhorse. Cubed or crushed ice provides excellent surface contact, enveloping the fish and quickly drawing heat away from its flesh. This is ideal for creating an ice slurry, which we'll discuss next. The downside is that it melts faster than block ice.
A smart strategy often involves a combination: a layer of block ice at the bottom for longevity, topped with a generous amount of cubed or crushed ice to create that crucial slurry. When considering how much ice, a good rule of thumb is at least a 2:1 ratio of ice to fish, by weight. If you expect to catch 20 pounds of fish, bring 40 pounds of ice! Always err on the side of bringing too much rather than too little, especially on a sweltering Florida day. You can always find extra ice for sale at marinas or larger tackle shops if you misjudge. You can even find reusable ice packs and gel packs on Amazon that can supplement your regular ice, especially for shorter trips or when trying to save cooler space.
Bleeding and Gilling: The First Steps to Superior Quality
These might sound a bit grisly, but they are absolutely critical for maximizing the flavor and shelf-life of your catch. Many seasoned anglers will tell you that bleeding a fish is one of the most impactful steps you can take for quality.
- Why Bleed? Fish blood contains metabolic waste products and can cause the flesh to spoil faster and taste "fishy." When cooked, blood remnants can also give the fillets a darker, less appealing appearance and a stronger, metallic taste. By bleeding the fish immediately after dispatching it, you remove a significant portion of this blood, resulting in cleaner, whiter, and milder-tasting fillets.
- How to Bleed: The most common method involves making a clean, deep cut to the main artery or arteries in the gill arches, just behind the head. For larger fish, a single slit across the throat can achieve the same effect. Some anglers also opt for spiking the brain (ikejime) immediately, then cutting the gills. Hold the fish head-down, allowing the blood to drain into a bucket or directly overboard (if regulations permit and you're far from swimming areas). Let it bleed out for several minutes until the blood flow significantly diminishes.
- Gilling: For larger fish, some anglers will also remove the gills. Gills are rich in bacteria and can contribute to rapid spoilage. By removing them, you eliminate another source of bacterial contamination. This also makes the fish fit better in the cooler.
You'll want a sharp, sturdy knife for this process. A good fillet knife or even a strong utility knife will do the trick. Just be careful when handling sharp objects on a moving boat.
Step-by-Step On-Board Preservation Techniques
Now that we understand the "why" and have our gear ready, let's walk through the actual process of getting your fish from the hook to the cooler in prime condition.
Catching and Dispatching Humanely
The journey to freshness actually begins before the fish even hits the cooler. Minimizing stress on the fish is key, as a stressed fish produces lactic acid that can negatively impact meat quality.
When you bring a fish aboard that you intend to keep, try to minimize its flopping and struggling on the deck. A quick, humane dispatch is best. The most common and effective methods include:
- Brain Spiking (Ikejime): This is a Japanese technique that involves immediately inserting a sharp spike into the fish's brain, causing instant death and preventing the release of stress hormones. It's considered by many to be the superior method for preserving fish quality. Locate the brain, often just above and behind the eyes, and insert the spike quickly. This can take a little practice to get right, but it's incredibly effective.
- Blunt Force Trauma: A firm, swift blow to the top of the head with a fish bat or priest will dispatch the fish quickly. The key here is swift and firm. Don't prolong the process with multiple weak taps.
Once the fish is dispatched, immediately proceed to bleeding it as described above. This combination of humane dispatch and quick bleeding sets the stage for exceptional quality. While we're talking about humane practices, it's a good time to remember the importance of Catch and Release Best Practices for Snook for fish you aren't keeping, ensuring they swim away healthy.
The Ice Slurry Method
This is hands-down the most effective way to chill your fish quickly and thoroughly on the boat. An ice slurry is a mixture of ice and saltwater (or even freshwater if you're in a pinch, but saltwater is better as it can drop below 32°F/0°C without freezing, making it colder).
Here's how to create and use the perfect slurry:
- Prepare Your Cooler: Ensure your pre-chilled cooler has a good base layer of block ice.
- Add Crushed/Cubed Ice: Fill the rest of the cooler mostly with cubed or crushed ice.
- Add Water: Pour enough saltwater (from the ocean or lake you're fishing in) into the cooler to create a slushy, soup-like consistency. You want the fish to be fully submerged in this icy mixture, not just resting on top of dry ice. The water allows the ice to make full contact with the entire surface area of the fish, rapidly conducting heat away.
- Submerge Your Fish: After dispatching and bleeding your fish, immediately place it into the ice slurry. Make sure it's completely covered by the icy slush.
- Maintain the Slurry: Throughout the day, monitor the slurry. If it becomes too watery, drain some of the meltwater and add more ice. The goal is to keep it super cold and slushy. This method is far superior to simply laying fish on dry ice, as the direct contact with the icy water draws heat away much faster.
This method works wonders for almost all species, from a delicate Florida pompano to a robust redfish. It's a fundamental technique for any angler wanting to preserve their catch.
Protecting Your Catch from the Elements
Even with a perfect ice slurry, external factors can sabotage your efforts. The relentless Florida sun is a powerful force, and it will work against your cooler if you let it.
- Shade, Shade, Shade: Position your cooler in the shadiest part of your boat. If your boat has a T-top, Bimini, or cabin, utilize it. Every degree you can keep off the cooler exterior helps preserve your ice and, by extension, your fish.
- Cover Up: If direct shade isn't available, throw a wet towel, a reflective blanket, or even a specialized cooler cover over your cooler. This acts as an additional layer of insulation and reflects radiant heat from the sun. Think of it like wearing a hat on a scorching day – it makes a huge difference.
- Don't Open Unnecessarily: Every time you open the cooler, warm air rushes in, and cold air escapes. Be mindful of how often you open it. Plan your catches, so you're not constantly rummaging.
- Segregate if Needed: If you're mixing baitfish (like mullet or pinfish, which you might catch using a cast net, a skill worth mastering to gather Best Live Bait for Florida Inshore Fishing) with your eating fish, it might be wise to use separate coolers. Baitfish often aren't bled or cared for with the same rigor, and their decomposition could impact your prime fillets.
Understanding How Hot Weather Affects Summer Fishing in Florida is not just about finding the fish; it's also about protecting the fish once it's caught.
Handling and Storage Best Practices
Once your fish is in the slurry, your job isn't quite done. Proper internal management of the cooler ensures every fish gets the best treatment.
- Layer with Care: Don't just dump fish on top of each other. Ensure there's plenty of ice slurry between each fish. Think of it as creating layers of icy goodness. This maximizes surface contact for every single fish.
- Keep Out of Freshwater Melt: While the slurry is great, prolonged exposure to freshwater melt can degrade the fish's skin and flavor over a long period. Many high-quality coolers have a drain plug; occasionally draining some of the accumulated freshwater and replenishing with fresh ice and a bit of saltwater can be beneficial, especially on very long trips. However, the initial goal is getting it cold, and the slurry is best for that.
- Mind Your Regulations: Always be mindful of Florida Fishing Regulations and Bag Limits. Know your slot limits and bag limits before you even head out, so you're only keeping legal fish and can properly prepare them. This avoids any issues and ensures you're fishing responsibly.
| Ice Type | Pros | Cons | Best Use |
|---|---|---|---|
| Block Ice | Lasts longest, melts slowly, solid base | Less surface contact, takes up more space | Long trips, base layer in cooler |
| Crushed/Cubed | Excellent surface contact, quick cooling | Melts faster than block ice, fills quickly | Fish slurry, immediate cooling, filling gaps |
| Gel Packs | Reusable, no messy water, convenient | Limited cooling capacity, best for smaller fish | Short trips, supplemental cooling, drinks cooler |
Common Pitfalls and Troubleshooting
Even with the best intentions, things can go wrong. Recognizing common mistakes and knowing how to troubleshoot them can save your catch from an untimely demise in the heat.
The "Dry Cooler" Mistake
This is one of the most frequent errors, especially among less experienced anglers. Many people simply dump a bag of ice into a cooler and then lay their fish on top, assuming the cold air will do the trick. While it's better than nothing, it's far from optimal.
The problem is air. Air is a poor conductor of heat compared to water. When a fish is just sitting on dry ice, only the bottom surface is making direct contact with the cold. The top and sides are exposed to trapped pockets of slightly warmer air within the cooler, which slows the chilling process significantly. In warm Florida temperatures, this delay can be detrimental. The fish cools unevenly, and the interior flesh can stay warm for too long, allowing bacteria to thrive. The solution, as we've discussed, is the ice slurry. Submerging the entire fish in icy water ensures rapid, uniform cooling, maximizing freshness.
Running Out of Ice Mid-Trip
It happens to the best of us. You misjudge the bite, catch more fish than expected, or the day is hotter than forecast, and suddenly your ice supply is dwindling. This is a stressful situation, but not necessarily a lost cause.
- Plan Ahead: The best "troubleshooting" is preventative. Always pack more ice than you think you'll need. If you're planning a Florida Fishing Charter Guide for a full day of offshore action, discuss ice provisions with your captain. They often have robust ice chests on board, but it's always good to confirm. For your own boat, a general rule of thumb is to calculate for at least twice the anticipated weight of your catch, or even more for exceptionally hot days or long trips.
- Emergency Measures: If you find yourself critically low on ice, and a replenishment stop isn't feasible, you have limited options. For very short periods, and only as a last resort, some might consider using a livewell filled with fresh seawater. While this keeps fish alive, it doesn't chill them effectively enough for preservation. The water temperature will still be too warm for optimal freshness. Your primary goal must be to get back to a source of ice as quickly as possible. Many marinas and bait shops sell ice, even those in more remote areas. Knowing the locations of these spots beforehand can be a lifesaver.
Mixing Catch with Non-Catch Items
This is a simple oversight that can lead to big problems, particularly concerning food safety and taste. Imagine a cooler containing your freshly caught, bled-out snapper, nestled next to your lunchtime sandwiches and sodas.
- Cross-Contamination: Raw fish, especially its blood and slime, can harbor bacteria. Allowing these to come into contact with ready-to-eat foods like sandwiches, fruits, or beverages can lead to cross-contamination and potential illness. Even if your fish is perfectly handled, the bacteria from the fish could transfer to your lunch.
- Odor and Flavor Transfer: Fish have distinct odors. While desirable for dinner, you probably don't want your bottled water tasting faintly of Spanish mackerel. Keeping fish separate from your personal provisions is a matter of both hygiene and pleasantness.
- The Dedicated Cooler: The solution is simple: have a dedicated "fishing cooler" for your catch and a separate "provision cooler" for your food and drinks. This eliminates any risk of cross-contamination and ensures your lunch remains untouched by fishy smells. You can find excellent dedicated fishing coolers of various sizes and insulation levels on Amazon, ranging from heavy-duty roto-molded coolers to convenient insulated bags specifically designed for fish.
By being mindful of these common pitfalls and having a plan, you'll be well on your way to enjoying the freshest possible fish from your next Florida adventure. From the thrill of the catch to the delicious meal on your plate, proper care makes all the difference. Knowing How to Fillet a Grouper or other species is the final step in a successful fishing trip, but it all starts with keeping that fish perfectly fresh on the boat.
Disclaimer
This article is for general informational purposes only and does not constitute professional advice. Laws, prices and regulations vary by location and change over time. Consult a qualified professional for guidance on your specific situation.