How to Use a Fish Finder for Inshore Fishing
Oh, the age-old dilemma of inshore fishing! You've got your rod, your bait, the perfect tide, and yet, sometimes those elusive fish just seem to vanish, right? It's frustrating to be out on the water, knowing the fish are somewhere but having no idea exactly where to cast. This guide is all about demystifying one of the most powerful tools in an angler's arsenal: the fish finder, and how you can harness its potential to drastically improve your success in Florida's incredible inshore waters.
Understanding Your Fish Finder for Inshore Waters
Before you can truly master your fish finder, it's essential to understand the basic science behind it and what makes certain features more critical for inshore environments. Inshore fishing presents unique challenges compared to deep-sea angling, primarily due to shallower depths, varied bottom compositions, and a higher density of structure.
The Basics: How Sonar Works in Shallow Water
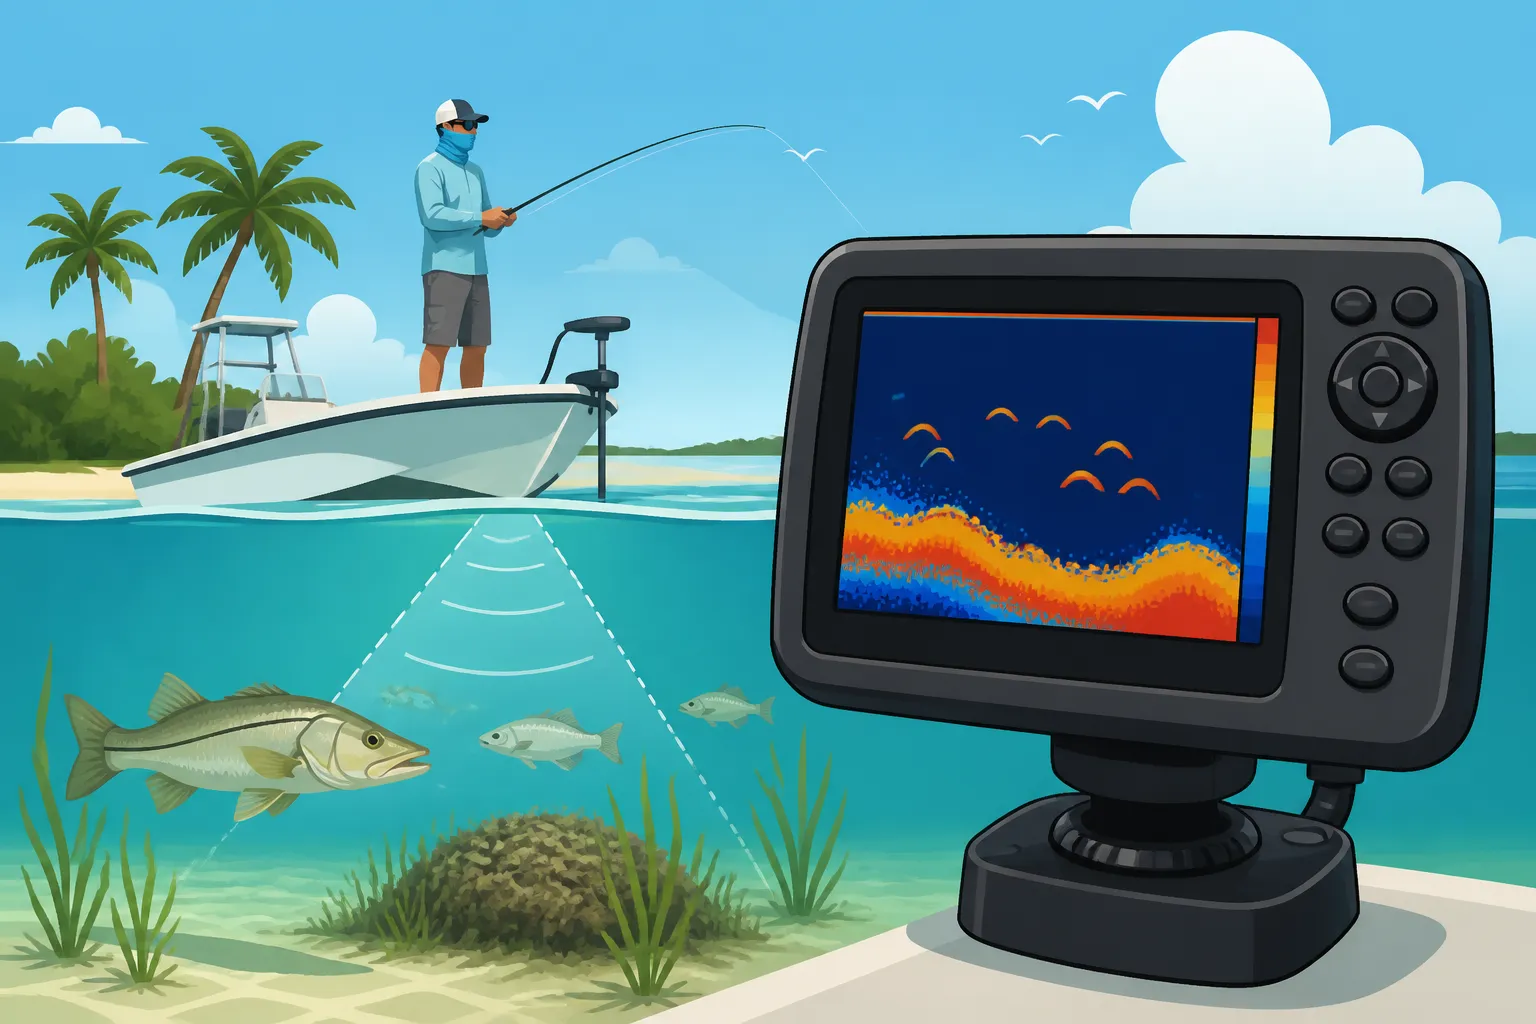
At its heart, a fish finder uses sonar technology. It sends out sound waves from a transducer, which then bounce off objects in the water column and the bottom, returning as echoes to the transducer. The unit measures the time it takes for these echoes to return and converts that information into an image on your screen. Faster returns mean closer objects, while slower returns indicate deeper ones.
In shallow inshore waters, this process happens incredibly quickly. The key is to understand that the "cone" of sound your transducer emits spreads out as it goes deeper. In shallow water, this cone is much smaller, meaning you're only seeing a narrow slice of the water directly beneath your boat. This is why sensitivity and frequency settings become so crucial. Too much sensitivity in shallow water can lead to a cluttered screen full of noise, mistaking grass blades or tiny particles for fish. Too little, and you might miss those subtle bumps or the flash of a snook hiding in the seagrass.
Key Features for Inshore Success
When you're out there chasing redfish on the flats or snook in the mangroves, not all fish finder features are created equal. You want a unit that excels in specific areas tailored to the inshore game.
First, display resolution is paramount. A high-resolution screen allows you to discern fine details, differentiating between a small baitfish school and a larger predator lurking underneath. Pixels matter when you're trying to pick out a single fish arch amidst a busy bottom. Next, consider transducer cone angles and frequency settings. Many traditional 2D sonar units offer dual frequencies, typically 50/200 kHz or 83/200 kHz. For inshore fishing, the higher frequencies (like 200 kHz) provide better detail and target separation in shallow water, albeit with a narrower cone. A wider cone angle (often associated with lower frequencies like 83 kHz) covers more area but sacrifices detail. The ideal scenario is a unit that lets you run both or switch easily.
Finally, GPS integration and chart plotting are non-negotiable for inshore anglers. Florida's inshore waters are a maze of channels, oyster bars, and hidden wrecks. Being able to mark a productive spot, navigate to a specific depth contour, or follow a channel marker is invaluable. Many fish finders, especially those you might find on Amazon, come with pre-loaded coastal charts or the ability to add detailed mapping. This combination of fish-finding sonar and navigational capability transforms your unit into a powerful tactical tool. How to Use a Fish Finder for Inshore Fishing
Setting Up Your Fish Finder for Optimal Inshore Performance
Having a powerful fish finder is one thing; setting it up correctly for Florida's unique inshore conditions is another entirely. A poorly installed transducer or incorrect settings can turn your expensive electronics into nothing more than a fancy depth gauge.
Transducer Placement and Configuration
The transducer is the "eyes and ears" of your fish finder. Its placement is critical. For most smaller inshore boats, a transom-mount transducer is common. It needs to be mounted in a location free from turbulence and air bubbles created by the hull or propeller. The ideal spot is usually on the lowest part of the transom, slightly off-center from the propeller, so it's constantly in clean water. You'll want it deep enough to stay submerged at speed but not so deep that it creates excessive drag or is vulnerable to striking underwater objects in shallow flats.
For kayaks or trolling motor setups, specific trolling motor mount transducers are fantastic as they put the sonar directly in front of your fishing direction, offering a clear view. When installing, pay close attention to the angle. It should be parallel to the waterline when your boat is at rest. Even a slight tilt can significantly impact performance, especially when using advanced imaging like SideScan or DownScan. Improper mounting can lead to "reading the prop wash" rather than the bottom, giving you a screen full of garbled noise.
Adjusting Settings for Inshore Conditions
Once physically installed, dialing in your fish finder's settings is paramount for inshore success. Think of it like tuning a radio – you need to find the right frequency and clarity.
- Sensitivity (Gain): This is perhaps the most critical setting for inshore fishing. It controls how much detail the sonar unit tries to pick up. In shallow, clear water, you'll often need to reduce the sensitivity compared to deeper offshore applications. Too high, and you'll see a messy screen full of clutter from algae, plankton, or even micro-bubbles. Too low, and you'll miss the subtle returns from fish. Start around 70-80% and slowly adjust it down until the screen is clear but you can still see the bottom and any distinct targets.
- Range (Depth): Set your depth range appropriately. If you're fishing a 5-foot flat, there's no need for your range to be set at 100 feet. Auto-range is helpful, but sometimes manually setting it just above the maximum depth you expect can provide a more detailed, expanded view of the water column.
- Scroll Speed: A faster scroll speed can give you a more "real-time" picture of what's beneath you, which is great when actively searching for schools of bait or fish. A slower speed can make fish arches appear longer and more distinct. Experiment to find what works for your typical fishing speed.
- Noise Rejection/Filter: Most modern units have noise reduction filters. Turn them on! They help eliminate interference from your boat's engine, other electronics, or even nearby boats. These filters are a lifesaver for getting a clean image in busy inshore areas.
- Frequency: As mentioned, use your higher frequency (e.g., 200 kHz) for maximum detail in shallow water. If your unit has a split-screen option, you might run 200 kHz on one side and a wider, lower frequency on the other if you're trying to cover more area.
A good example of adjusting these settings is when you move from a deep channel (say, 15-20 feet) to a shallow grass flat (3-5 feet). In the channel, you might have moderate sensitivity to pick up schooling baitfish. But as you transition to the flat, you'll want to lower that sensitivity significantly to avoid marking every blade of grass as a fish, focusing on distinct targets instead. This constant adjustment is part of the learning curve, but it pays off in spades.
Interpreting What You See on the Screen
The real magic of a fish finder isn't just seeing images; it's understanding what those images mean in the context of Florida's inshore fishery. Your screen isn't a photograph, but a representation that requires a little interpretation.
Identifying Fish, Structure, and Bait
Let's talk about the infamous fish arch. A classic fish arch is created as a fish passes through the transducer's cone. A full arch indicates a fish that swam directly through the center of the cone. Partial arches or thick lines could be fish on the edge of the cone, or even multiple fish close together. The thickness and length of the arch can give you clues about the size of the fish. Larger, longer arches usually mean bigger fish.
But fish aren't the only things down there! You also need to identify bottom contours and composition. A hard, flat line on the bottom usually signifies a hard bottom, like sand, shell, or rock — prime real estate for redfish, trout, and snook. A thick, diffused line might indicate a soft bottom, like mud or silt, which can hold different species like flounder or bottom-dwelling bait. Look for irregularities: ledges, potholes, and subtle changes in depth often hold fish. Best Spots to Catch Flounder in Florida
And then there's bait. Small, dense clouds of dots or short lines often represent bait balls. When you see these, especially with larger arches or lines beneath or around them, you've likely found a feeding frenzy in the making. Understanding these visual cues takes practice, but it's an incredibly rewarding skill to develop.
Advanced Techniques: Side Imaging and Down Imaging
Many modern fish finders, including various models you can find on Amazon, incorporate advanced imaging technologies like Side Imaging (also known as SideScan) and Down Imaging (or DownScan). These aren't just fancy add-ons; they are game-changers for inshore fishing.
Down Imaging provides a photographic-like view directly beneath your boat. Instead of arches, you'll see more realistic representations of fish, bait, and structure. It's fantastic for distinguishing a submerged tree stump from a rock pile, or clearly seeing individual fish holding tight to a channel edge. This level of detail can be incredibly helpful for identifying specific types of structure that might hold snook or grouper in deeper inshore holes.
Side Imaging is where you can truly "scan" the flats without spooking fish directly under your boat. It sends out beams to the sides, allowing you to see up to hundreds of feet out from your boat, creating a wide swath of the bottom. Imagine quietly idling down a shoreline and being able to spot a school of redfish tucked under an oyster bar 50 feet to your left, or finding a submerged wreck just outside a channel. This technique allows you to cover vast areas quickly, identifying key structures, changes in bottom composition, and, most importantly, fish, without running directly over them. This is particularly effective for finding Florida Redfish Fishing Guide or locating bait schools in wide-open areas.
Mastering these technologies takes practice, but once you start seeing the details they provide, you'll wonder how you ever fished without them.
Integrating Your Fish Finder into Your Fishing Strategy
A fish finder is more than just a piece of equipment; it's an integral part of your entire fishing strategy, from planning your trip to executing your casts on the water.
Pre-Trip Planning and Waypoint Management
Modern fish finders often come with detailed mapping capabilities, turning them into powerful chartplotters. Before you even leave the dock, you can use these maps to identify potential fishing grounds. Look for contour lines that indicate drop-offs, channels, or humps – areas where fish love to ambush bait. Study satellite imagery, if available, to pinpoint oyster bars, mangrove lines, or submerged vegetation.
Once you've identified these promising areas, mark them as waypoints on your fish finder. These digital breadcrumbs become your personalized fishing map. During your trip, if you find a productive spot, a thermocline, a school of bait, or a significant fish, mark it immediately! Over time, these waypoints will build up a powerful database of proven spots. This is invaluable in Florida, where good fishing spots can be fleeting and depend on factors like Best Tides for Inshore Fishing in Florida or specific bottom structure. Don't be afraid to experiment and mark new areas; the more data you collect, the smarter you'll fish.
Real-Time Applications on the Water
This is where all that learning comes together. Once you're on the water, your fish finder transforms from a planning tool into a real-time tactical advantage.
- Locating Schools of Bait and Fish: Use your 2D sonar or Side Imaging to scan for bait balls or schools of fish. If you see a dense cloud of bait, slow down and investigate. Predators are almost certainly nearby. If you mark fish arches on a drop-off, position your boat upstream and let your bait or lure drift into the zone.
- Finding Structure and Depth Changes: Actively watch your screen as you move. Look for those subtle humps, potholes, or shell beds on the flats. A slight change in depth from 4 feet to 6 feet might seem insignificant, but it could be the perfect ambush point for a hungry snook. Your fish finder helps you identify these underwater nuances that are invisible to the naked eye. Florida Inshore Fishing Techniques
- Drifting and Targeting: If you're drifting a flat or a channel, keep an eye on your screen. When you see a promising structure or fish, be ready to cast. If you pass over a hot spot, mark a waypoint immediately so you can return to it later or make another drift. Many anglers even use their fish finders to confirm the type of bottom they are drifting over, adjusting their lures or bait rigs accordingly. For instance, if you see thick grass, you might switch to a weedless presentation.
By constantly monitoring your fish finder and actively interpreting its display, you're not just hoping to find fish; you're actively hunting them with cutting-edge technology. Whether you're a seasoned angler or just starting out, incorporating a fish finder into your Florida inshore fishing strategy will undoubtedly lead to more successful and rewarding days on the water. You can explore a wide variety of units, from basic models perfect for a kayak to advanced multi-function displays, readily available on Amazon to fit any budget or need.
| Feature | Primary Benefit for Inshore Fishing | Why It Matters |
|---|---|---|
| High-Resolution Display | Clear distinction between fish, bait, and structure in shallow water. | Avoids clutter, helps identify target species vs. debris. |
| Dual-Frequency Sonar | Better detail (200 kHz) and wider coverage (83 kHz) options. | Adapt to varying depths and clarity; pinpoints fish precisely. |
| GPS & Chartplotter | Navigation, marking productive spots (waypoints), and mapping. | Crucial for navigating complex inshore waters and remembering hot spots. |
| Down Imaging | Photo-like views of what's directly below the boat. | Clearly identifies submerged structure like oyster beds or ledges. |
| Side Imaging | Scans wide areas to the left and right of the boat. | Locates fish and structure without running directly over them, covering more ground. |
| Adjustable Sensitivity | Fine-tuning the unit for varying water clarity and depth. | Prevents false readings from clutter; ensures you see subtle fish returns. |
Florida Fishing Regulations and Bag Limits are important to remember, even with the help of your new tech, so always double-check the rules for the species you're targeting. And remember, the best way to get proficient with your fish finder is to use it, experiment with settings, and learn from every trip. You'll be amazed at how much more you discover about Florida's amazing underwater world!
Disclaimer
This article is for general informational purposes only and does not constitute professional advice. Laws, prices and regulations vary by location and change over time. Consult a qualified professional for guidance on your specific situation.