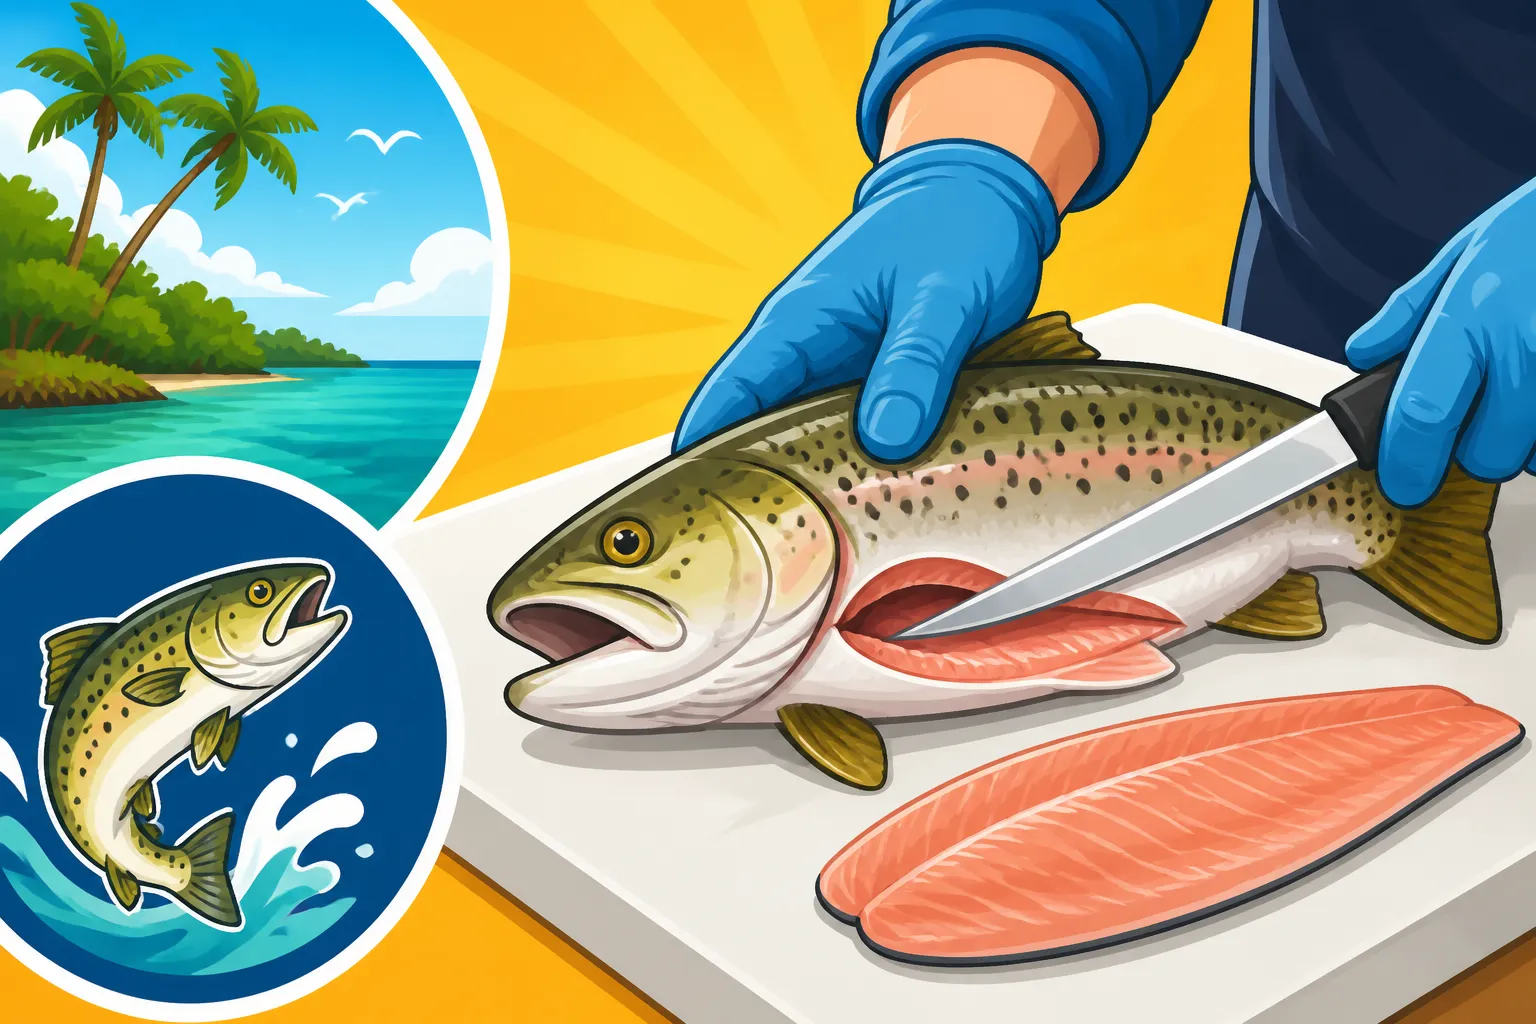
How to Clean a Trout for Cooking
Ah, there's nothing quite like the thrill of reeling in a beautiful Florida trout, whether it's a speckled seatrout from the flats or a feisty rainbow from a stocked pond up north. But let's be honest, that triumphant moment often quickly gives way to a common angler's lament: "Now what do I do with it?" Cleaning a fish can feel daunting, messy, and intimidating, but fear not! This guide is here to walk you through the process, ensuring your hard-earned catch transforms from a slippery creature into a delicious meal with confidence and ease.
Why Proper Cleaning is Essential for Delicious Trout
You’ve spent time, effort, and probably a little bit of sweat to catch that trout, so why would you risk ruining its flavor and texture by skimping on the cleaning process? The way you handle your fish immediately after the catch, and the thoroughness with which you clean it, directly impacts how it will taste on your plate. It's not just about getting the guts out; it's about preserving the quality of the meat you're so eager to enjoy.
The Freshness Factor: Taste and Texture
Think of a freshly picked tomato versus one that's sat on the counter for a week – the difference is palpable. Fish is no different, perhaps even more sensitive to time and temperature. When you catch a trout, its internal organs contain enzymes and bacteria that, left unchecked, will rapidly start to break down the flesh. This process, often accelerated by warm Florida temperatures, can lead to off-flavors, a mushy texture, and a distinctly "fishy" smell that nobody wants. Prompt and proper cleaning stops this degradation in its tracks.
Immediately removing the entrails helps to cool the fish from the inside out and prevents those enzymes from tainting the delicate meat. The bloodline, a dark stripe of tissue along the spine, contains a lot of blood and can contribute a strong, metallic, or gamey flavor if not removed. By cleaning your trout swiftly and thoroughly, you’re locking in that sweet, mild, and flaky taste that makes trout such a beloved fish. It's the difference between a culinary delight and a disappointing dinner, truly. And trust me, after spending a morning on the water, you want the former!
Health and Safety Considerations
Beyond just taste, proper fish cleaning is absolutely vital for your health and safety. Fish, like any other animal product, can harbor bacteria and, occasionally, parasites that you definitely don't want to consume. While trout from clean Florida waters are generally safe, proper handling minimizes any potential risks. For those interested in where to find such waters, our guide on the Best Freshwater Fishing Lakes in Florida can offer some prime locations.
When you remove the guts, you're getting rid of the primary source of many bacteria that could otherwise multiply and contaminate the edible meat. Careful scraping of the cavity and thorough rinsing under cold water flushes away any remaining contaminants. This also prevents cross-contamination in your kitchen. Imagine preparing a beautiful trout on your cutting board, only to then use that same unwashed board for vegetables. Yikes! That’s a recipe for trouble. Using separate surfaces, or cleaning thoroughly between tasks, is paramount. Additionally, if you plan to keep your catch fresh for a while before cleaning, understanding the Best Way to Keep Fish Fresh on a Boat is crucial to maintaining safety and quality from the moment it leaves the water. Always be mindful of Florida Fishing Regulations and Bag Limits too, as ensuring you're legally permitted to keep your catch is the first step towards a safe and enjoyable meal.
Essential Tools for Cleaning Your Trout
Before you even think about making that first cut, it’s important to gather your gear. Just like you wouldn't go out for a day of fishing without the right bait or your trusty Best Rod and Reel Setup for Florida Inshore Fishing, you shouldn't approach the cleaning table unprepared. Having the right tools makes the job quicker, cleaner, and much more efficient, turning a potentially frustrating task into a smooth, almost meditative process.
The Basic Kit: What You Absolutely Need
You don’t need a tackle shop full of gadgets to clean a trout effectively. A few key items will get you through the process with flying colors. It's about having the right tool for the specific job, not about having all the tools.
First and foremost, a sharp fillet knife is non-negotiable. I cannot stress this enough. A dull knife is not only ineffective, making the job harder and messier, but it’s also incredibly dangerous. You’re more likely to slip and cut yourself with a dull blade than a sharp one. For trout, a flexible blade around 6-7 inches is ideal, allowing you to maneuver easily around bones and delicate flesh. Brands like Rapala or Bubba Blade are popular choices among anglers, and you can find a great selection on platforms like Amazon.
Next up, you'll need a sturdy cutting board. Choose one that’s easy to clean, like plastic, and ideally one with a non-slip surface or rubber feet to keep it from sliding around on your counter. Nobody wants their cutting board playing slip-and-slide while they’re working with a knife! You'll also need a bowl or bucket for the entrails. This keeps your workspace tidy and makes disposal much simpler. And of course, access to running water is key – whether it's a kitchen sink, an outdoor hose, or even a bucket of clean water if you're out in the wild. Finally, gloves (latex or nitrile) are optional but highly recommended. They provide a better grip on a slippery fish, protect your hands from cuts and fish slime, and offer an extra layer of hygiene.
Optional Gear for Easier Cleaning
While the basic kit will get the job done, there are a few extra pieces of gear that can make the trout cleaning process even smoother, especially if you plan on making fish cleaning a regular ritual after your angling adventures.
A fish scaler is one of those items that some swear by, while others prefer the old knife-edge trick. These tools come in various forms, from simple handheld metal scrapers to electric models. They're designed to remove scales quickly and with less mess than a knife. The decision to scale depends on how you plan to cook your trout. If you're frying it whole or baking it with the skin on, scaling is a must. However, if you're planning to skin your fillets, a scaler becomes unnecessary.
Another handy addition is a fish gripper or a cleaning board with a clamp. These tools hold the fish firmly in place, freeing up both your hands to wield the knife safely and efficiently. This is especially helpful if you’re working with larger trout or if you find the fish particularly slick. After the cleaning is done, a cooler with ice is absolutely crucial for immediate post-cleaning storage. Getting that cleaned trout on ice as quickly as possible maintains its freshness until it's ready for the pan or freezer. Lastly, a small spoon or dedicated scraper can be surprisingly useful for cleaning out the bloodline along the trout's spine, ensuring you get every last bit of that gamey tissue removed. You can often find specialty tools like these on Amazon, making it easy to build your perfect cleaning station.
Step-by-Step Guide to Cleaning a Trout
Okay, you've got your beautiful trout, your sharp knife, and your cleaning station is prepped. Now for the main event! This step-by-step guide will walk you through the process, from gutting to final rinse, ensuring you handle your catch with care and precision. Remember, practice makes perfect, and soon you'll be cleaning trout like a seasoned pro!
Gutting the Fish
This is arguably the most critical part of the cleaning process for preserving flavor and ensuring hygiene. Taking your time here will pay dividends on the dinner plate.
Step 1: The Initial Cut. Lay your trout flat on your cutting board, belly-side up. With your sharp knife, carefully insert the tip into the small vent opening near the tail fin. Gently slice forward, shallowly, all the way up to the gills. The goal here is to cut through the skin and muscle layers of the belly without piercing the internal organs, particularly the intestines or the gallbladder. If you nick the gallbladder (a small, greenish sac), it can release bile that will impart a bitter taste to the meat, so precision is key. Keep your knife just barely beneath the skin.
Step 2: Carefully Scoop Out the Entrails. Once the belly is open, gently reach inside with your fingers or a small spoon. Starting from the vent end, carefully scoop out all the internal organs. Pull them out in one cohesive mass if possible, minimizing the chance of anything breaking open. Place them directly into your designated waste bowl. Take a moment to inspect the cavity, ensuring no loose bits of organ or membrane remain clinging to the walls. It might feel a little squishy and, well, gutsy, but this is where the magic of freshness begins.
Step 3: Scrape Out the Bloodline (Kidney Tissue). This dark red or brownish line runs along the backbone inside the cavity. This is the kidney tissue, and it's essential to remove it for the best flavor. While rinsing under cold, running water, use your thumbnail, the tip of a spoon, or the back of your knife blade to firmly scrape this line from tail to head. You'll see it peel away. Keep scraping and rinsing until the cavity is clean and pearly white, completely free of any dark residue. This step is particularly important for speckled trout you might catch while exploring Florida's coastal waters, where regulations often guide specific catch sizes, as detailed in our Florida Spotted Seatrout Fishing Guide.
Scaling or Skinning Your Trout
Now that the trout is gutted and rinsed internally, you have a choice: scales or no scales? The decision often comes down to personal preference and how you plan to cook your fish. Some recipes call for skin-on, crispy presentation, while others prefer the skin removed.
Scaling: If you choose to keep the skin on your trout for baking, grilling, or pan-frying, you'll need to remove the scales. To do this, hold the fish firmly by the tail, preferably under cold, running water to minimize mess. Using a fish scaler, or the back of your knife blade, scrape against the grain of the scales, from tail to head. Apply firm, short strokes, watching as the scales lift and come off. Be thorough, getting into all the nooks and crannies, especially near the fins and head. Scales can fly, so an outdoor cleaning station or a deep sink is a good idea. Once you believe all the scales are gone, give the fish another thorough rinse and rub it down. If you feel any rough patches, scale them again. You'll be surprised how many scales a trout can have!
Skinning: If your recipe calls for skinless fillets, or if you simply prefer not to deal with scales, skinning is the way to go. This method is often preferred for larger trout or if you're looking to create delicate, boneless fillets. The process usually involves filleting the fish first (cutting the meat away from the bones), then laying the fillet skin-side down on your board. Hold the tail end of the skin firmly with one hand, and with your sharp fillet knife at a shallow angle, slide the blade between the skin and the flesh, pushing the knife forward while wiggling it slightly. The skin should separate cleanly from the meat. This technique is similar to what you might do if you were learning How to Fillet a Grouper, though trout are generally smaller and more delicate.
Rinsing and Final Preparation
You’re almost there! The final steps are all about ensuring your trout is pristine and ready for its culinary journey.
After scaling or skinning (and filleting, if you chose that route), give your trout a final, thorough rinse under cold, running water. Pay special attention to the body cavity, ensuring all traces of blood, scales, or any stray bits of organ are completely washed away. Don't be shy with the water – cleanliness here is paramount.
Once rinsed, gently pat the fish dry, inside and out, with paper towels. Removing excess moisture is important, especially if you plan to pan-fry or bake, as it helps achieve that desirable crispy skin (if you kept it) and prevents steaming. A dry surface also helps with seasoning adhesion.
Now, your trout is cleaned and ready. You can cook it whole, head-on or head-off, which is often a beautiful presentation. Alternatively, if you filleted it, you'll have boneless, skinless (or skin-on) portions perfect for a variety of dishes. Remember, knowing your Florida Fishing Seasons Explained can help you anticipate when certain trout species are most abundant and in prime condition for cleaning and cooking.
Common Mistakes to Avoid When Cleaning Trout
Even experienced anglers can make a misstep now and then when cleaning fish. While the process isn't rocket science, a few common errors can significantly impact the taste, presentation, and safety of your meal. Being aware of these pitfalls can help you avoid them and ensure your freshly caught trout is nothing short of culinary perfection.
Puncturing the Gallbladder or Intestines
This is perhaps the most dreaded mistake when gutting any fish, and trout are no exception. The gallbladder is a small, usually greenish or yellowish sac located near the liver, nestled within the cluster of organs. If you accidentally pierce it with your knife or fingers, it releases a potent, incredibly bitter bile that can quickly spread and taint the surrounding flesh. The taste is incredibly hard to get rid of, often rendering a good portion of the fish inedible. Similarly, puncturing the intestines, while not as intensely bitter as bile, can release digestive contents that are messy, unhygienic, and can also impart undesirable flavors.
Tips for Prevention:
- Shallow Cuts: When making the initial cut from the vent to the gills, keep your knife blade as shallow as possible, just barely breaking through the skin and muscle layer. Use the very tip of your knife and guide it with gentle pressure.
- Gentle Removal: When scooping out the entrails, be gentle. Use your fingers or a small, blunt spoon rather than aggressively digging with a sharp knife. Try to keep the organ mass together as you pull it out.
- Visual Inspection: Before you even start cutting, try to visually locate the general area of the organs. While you can't see them directly from the outside, having an idea of where they sit can help you be more cautious.
- Immediate Rinse (if it happens): If you do accidentally puncture the gallbladder, immediately rinse the affected area vigorously with cold water. You might need to trim away any flesh that has come into direct contact with the bile, but act quickly to minimize spread.
Neglecting the Bloodline
We touched on this earlier, but it bears repeating because it's such a common oversight. The "bloodline" isn't a blood vessel in the traditional sense, but rather a strip of dark, often bloody-looking, kidney tissue that runs along the inside of the backbone in the fish's cavity. Many anglers, especially beginners, might rinse the cavity and assume it's clean, leaving this tissue behind.
Why it Matters: This kidney tissue contains a lot of blood and can contribute a strong, metallic, or overtly "fishy" flavor to your cooked trout. It can also cause the meat to spoil faster. For those who claim they "don't like fish," often it's this un-removed bloodline that contributes to their aversion. A properly cleaned trout should have a very mild, sweet flavor, quite different from a poorly cleaned one.
How to Ensure It's Fully Removed:
- Active Scraping: Don't just rinse. While holding the trout under cold running water, use your thumbnail, the tip of a spoon, or the back edge of your fillet knife (be careful with the sharp edge!) to firmly scrape this dark line from one end of the cavity to the other.
- Visual Confirmation: Keep scraping and rinsing until that dark line is completely gone, and the bone underneath and the surrounding cavity walls are clean and white. You'll literally see the difference. This diligence is what separates a good eating fish from a great one, much like the precision needed to understand Florida Freshwater Fishing License Rules before you even cast a line.
Improper Storage Post-Cleaning
You've done all the hard work: caught the fish, cleaned it meticulously. The last thing you want is to undermine all that effort by improperly storing it. Fish, especially trout, are highly perishable, and temperature control is paramount after cleaning.
Importance of Chilling Quickly: Just like with any perishable food, bacteria begin to multiply rapidly at warmer temperatures. Even a thoroughly cleaned fish can degrade quickly if not chilled properly.
Best Practices for Post-Cleaning Storage:
- Ice Bath: The absolute best way to store cleaned trout short-term (up to 24-48 hours) is in an ice bath. Place the fish in a sealed plastic bag (to prevent waterlogging), then bury it completely in ice in a cooler. Alternatively, if you're planning to cook it within hours, a platter of ice in your refrigerator will work.
- Air Exposure: Avoid leaving cleaned fish exposed to air for extended periods, as this can lead to dehydration and freezer burn if freezing.
- Vacuum Sealing: For longer-term storage in the freezer, vacuum sealing is your best friend. It removes air, which is the enemy of frozen fish, preventing freezer burn and preserving quality for several months. If you don't have a vacuum sealer, wrap the fish tightly in plastic wrap, then a layer of aluminum foil, and place it in a freezer bag, squeezing out as much air as possible.
- Labeling: Always label your frozen fish with the date it was caught and cleaned. This helps you track freshness.
Remember, the goal is to get that fish from the water to the plate (or freezer) in peak condition. Proper storage is the final, crucial step in that journey. Whether you're targeting brook trout in a mountain stream or the prized spotted seatrout on the flats, the care you put into cleaning and storage makes all the difference. And if you're ever wondering what kind of bait helps catch these beauties, check out our guide on the Best Bait for Trout Fishing in Florida. It's all part of the complete angling experience!
Disclaimer
This article is for general informational purposes only and does not constitute professional advice. Laws, prices and regulations vary by location and change over time. Consult a qualified professional for guidance on your specific situation.