How to Cast Net for Live Bait
There's nothing quite like the feeling of watching a school of baitfish swim right past your boat or dock, knowing you could have them if only you knew how to throw a cast net. For many anglers in Florida, the frustration of buying expensive live bait, only for it to be scarce or unhealthy, is a real pain. Mastering the art of cast netting not only saves you money but also gives you access to the freshest, liveliest bait, often the secret weapon for landing trophy fish. This guide is dedicated to breaking down everything you need to know about cast netting, from choosing the right gear to perfecting your throw and finding those elusive bait schools.
Selecting the Right Cast Net for Florida Waters
Before you even think about throwing a net, you need to make sure you've got the right tool for the job. A cast net isn't a one-size-fits-all piece of equipment, especially here in Florida where the types of bait and fishing environments vary wildly. Choosing wisely can make all the difference in your success and enjoyment.
Understanding Net Size and Mesh
When we talk about net size, we're primarily referring to its radius, which dictates the diameter of the net when fully opened. Common sizes range from 3-foot to 12-foot radius, but for most recreational bait-catching in Florida, a 6-foot or 8-foot radius net is a great all-around choice. A 6-foot net is generally easier for beginners to handle and cast accurately, while an 8-foot net covers a larger area, increasing your chances of a bigger haul once you get the hang of it. Anything larger than 8 feet can be quite heavy and challenging to throw consistently, often reserved for more experienced anglers or commercial use.
Mesh size, on the other hand, refers to the size of the holes in the net. This is crucial because it determines what kind of bait you'll be able to catch and retain. Too large, and smaller baitfish will swim right through; too small, and it creates too much drag in the water, making it harder to throw and sink quickly.
- 1/4 inch mesh: Ideal for very small baits like glass minnows or tiny shrimp. However, these nets are often too slow to sink for fast-moving baitfish.
- 3/8 inch mesh: This is probably the most versatile mesh size for Florida inshore bait. It’s perfect for pilchards, threadfin herring, small mullet, and medium-sized shrimp. It sinks at a decent rate and doesn't get hung up too easily.
- 1/2 inch mesh: Great for larger baits like finger mullet, pinfish, or larger pilchards. It sinks faster than smaller mesh nets and is excellent when targeting bigger fish that prefer a more substantial meal. However, smaller baits might slip through.
Consider the primary bait you're after and the speed at which it moves. For fast-moving schools of pilchards, a net that sinks quickly is paramount, meaning a slightly larger mesh size might be beneficial.
Weight, Material, and Construction Quality
The lead line (or chain link weight) around the perimeter of the net is essential for a quick, wide spread and rapid sinking. Net weight is usually measured in pounds per foot. A heavier net, typically 1 to 1.5 pounds per foot, sinks faster, which is crucial for catching quick-moving bait like pilchards or threadfins that won't wait around. Lighter nets, around 0.75 pounds per foot, are easier to throw but might allow nimble bait to escape before the net closes. For general purpose use in Florida, aim for a net that's at least 1 pound per foot for effective bait catching.
When it comes to materials, most quality cast nets are made from monofilament or nylon.
- Monofilament nets are generally preferred by serious anglers. They are stiffer, which helps them open fully and consistently. They also absorb less water, making them lighter to retrieve and easier to dry. However, they can be more prone to tangling (especially if the mesh gets twisted) and can be a bit more expensive.
- Nylon nets are softer and more flexible. They're often more forgiving for beginners when it comes to tangles and tend to be more durable against abrasions, but they absorb water, becoming heavier when wet and can be harder to throw wide.
The construction quality really matters for longevity. Look for nets with reinforced lead lines, strong braille lines (the lines that pull the net closed), and securely tied knots. A well-constructed net will spread evenly and hold up to repeated use in saltwater. Many reliable options can be found on platforms like Amazon, with brands like Fitec, Betts, and Lee Fisher being popular choices among Florida anglers. Don't be afraid to read reviews and invest a little more for a net that will perform well and last for years.
Mastering the Art of the Cast Net Throw
Let's be honest, the idea of throwing a cast net can be intimidating. Many people have tried, only to end up with a tangled mess or a net that looks more like a taco than a pancake. But with a bit of practice and the right technique, you'll be throwing perfect circles in no time. It's a skill that pays off immensely, making it a key component of your Florida Inshore Fishing Techniques arsenal.
Common Casting Techniques
There are several ways to throw a cast net, and what works best often comes down to personal preference and comfort. Here are a couple of the most popular methods that anglers use to achieve that wide, flat spread.
1. The Shoulder Throw (Classic Method):
This is probably the most common technique and a great one to master.
- Preparation: First, gather the lead line and the horn (the small ring at the top of the net where all the braille lines meet) into one hand, usually your non-dominant hand. Make sure the retrieval line (the rope attached to the horn) is secured to your wrist.
- Gathering the Net: Let the net hang, then systematically gather the net, section by section, over your non-dominant arm, creating small loops or folds. You want to avoid tangles here, ensuring the lead line is free. Once you have about two-thirds of the net draped over your arm, take a section of the lead line from the bottom of the pile and put it in your dominant hand, holding it firmly.
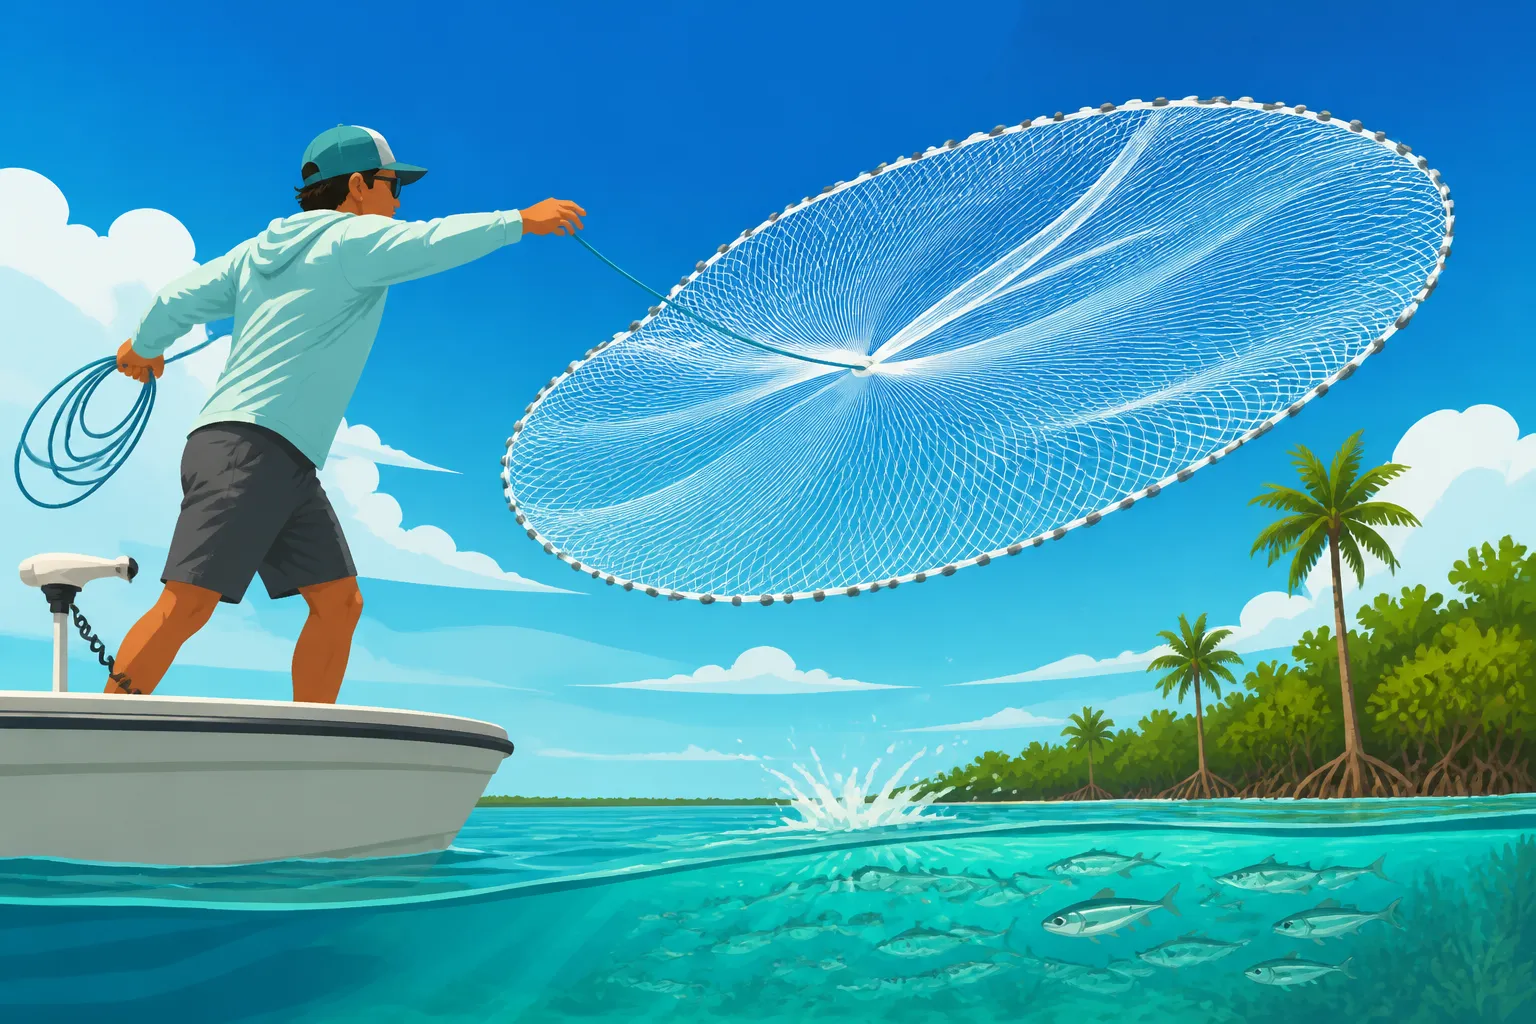
- The Swing: Turn your body slightly, away from your target. With a smooth, controlled motion, swing the net around your body, generating momentum. As the net comes around, release the lead line from your dominant hand first, followed by the net from your non-dominant arm, all in one fluid motion. The key is to snap your wrist and release the lead line in a way that helps the net "peel" open and spread out.
- Practice Tip: Start in your backyard or an open grassy area. You don't need water to get the motion down. Focus on the release and getting the net to open before worrying about accuracy. Once you're comfortable, move to a shallow, clear-bottomed area where you can see how your net is performing.
2. The Mouth/Bucket Method:
This technique is often favored by those who find the shoulder throw too strenuous or struggle with the initial setup.
- Preparation: Again, secure the retrieval line to your wrist and gather the horn and a few feet of the lead line in your non-dominant hand. Then, either place a small portion of the lead line in your teeth (yes, really!) or drape it over the lip of a five-gallon bucket.
- Gathering: With the net hanging, gather the rest of the lead line into your dominant hand, keeping the net from tangling.
- The Throw: With a twisting motion of your torso and arms, simultaneously release the lead line from your teeth/bucket and then from your dominant hand, allowing the net to spiral out and open. This method can sometimes provide a very wide, consistent spread because it helps distribute the weight evenly during the throw.
- Practice Tip: This method can be a bit awkward at first, especially if you're using your mouth. A bucket or a large cooler edge can be a good substitute to practice the release points without getting slobbery!
No matter which method you choose, the goal is always the same: a wide, flat, symmetrical pancake-like spread that descends evenly over the bait. Consistency comes with repetition, so don't get discouraged if your first few throws aren't perfect.
Common Mistakes and How to Correct Them
- "The Taco": This happens when the net folds in half, resembling a taco. It's usually caused by not releasing the lead line evenly or not getting enough momentum in the throw. Focus on a smoother, more powerful swing and ensuring both hands release their sections of the lead line almost simultaneously.
- "The Doughnut": When the net opens in a circle, but the center drops out, leaving a hole. This often means you're releasing the net too early or not imparting enough spin. Try to hold onto the net for a fraction of a second longer and really snap your wrist at the end of the throw.
- Tangles: This is the most frustrating issue. It almost always stems from improper gathering of the net before the throw. Take your time when flaking out the net, making sure all the lead line is free and the braille lines aren't twisted. Practice "reading" your net as you gather it, ensuring everything is in its place.
- Not Enough Spread: If the net isn't opening wide enough, you might not be getting enough rotation or power into your throw. Engage your whole body – hips, core, and shoulders – to generate maximum momentum, not just your arms.
Remember, practice truly makes perfect. You'll develop muscle memory and a feel for your specific net. Many videos on YouTube can demonstrate these techniques visually, which can be a huge help.
Locating and Catching Live Bait in Florida
Okay, you've got your net, you've practiced your throw, now it's time for the real test: finding and catching that live bait. Florida's diverse aquatic environments offer a smorgasbord of baitfish, but knowing where to look and when to cast is key. This is where local knowledge and a keen eye for nature come into play.
Identifying Baitfish and Their Hangouts
Florida is teeming with various bait species, each with its preferred habitat.
- Pilchards (Whitebait), Threadfin Herring, Greenbacks: These are often the holy grail for saltwater anglers. They form large, tight schools and are incredibly effective for targeting snook, redfish, trout, and even tarpon. You'll find them congregating over grass flats, around oyster bars, near channel markers, and along mangrove shorelines. Keep an eye out for nervous water, subtle ripples, or even birds diving, which are sure signs of bait schools.
- Mullet: Both finger mullet (smaller) and larger mullet are fantastic baits, especially for snook and tarpon. Mullet are very common in estuaries, canals, and along beaches. Look for them jumping, or for their tell-tale "nervous water" wakes. They tend to stick to darker, muddier bottoms and can often be found in canals or under bridges.
- Pinfish: These hardy baits are excellent for a variety of inshore and nearshore species. They love structure and can be found over grass flats, around docks, pilings, and rocky areas. Pinfish are sometimes slower to react to a cast net, so a quick-sinking net is beneficial. For tips on how to catch this resilient bait, check out our guide on How to Catch Pinfish for Bait.
- Shrimp: Live shrimp are universally loved by almost every predatory fish in Florida. They inhabit grass flats, oyster beds, and muddy bottoms, especially in creeks and shallow bays. You might find them hopping at night around dock lights or bridge lights. Our guide on How to Catch Shrimp for Bait in Florida offers more detailed advice on targeting these tasty crustaceans.
Always be on the lookout for visual cues. Birds like terns and pelicans diving mean they're feeding on baitfish. Small splashes or "nervous water" can indicate a school just below the surface. Sometimes, the smell of bait in the air is a dead giveaway! You can learn more about how to pinpoint these elusive schools in our article, How to Find Bait Fish Schools From a Boat.
Optimal Locations and Conditions for Cast Netting
Timing and location are everything when it comes to cast netting.
- Grass Flats: These are prime locations for pilchards, threadfins, and pinfish. Look for areas with healthy seagrass beds, especially during higher tides. You can often see the baitfish schooling just above the grass. For specific locations, consider exploring the Best Grass Flats in Tampa Bay for Trout, which are often rich with baitfish.
- Docks and Piers: Many baitfish, particularly pilchards, threadfins, and even shrimp, will seek refuge and food around residential and public docks, especially those with lights at night. These structures provide cover from predators and attract plankton.
- Bridges and Inlets: These areas are natural funnels for baitfish, particularly during strong tidal flows. Baitfish stack up in eddies and current breaks, making them easier targets. Night fishing under bridge lights can be particularly productive, as the lights attract plankton, which in turn attracts bait. We have a detailed guide on the Best Spots for Night Fishing Under Bridge Lights.
- Mangrove Shorelines: Mangroves offer excellent protection and feeding grounds for smaller baitfish. Look for small pockets or channels within the mangroves where bait might be trapped or feeding.
- Beaches: Mullet often run along the beaches, especially during their fall migration. Look for them in the surf line or just beyond it.
Tides and Time of Day:
Baitfish movement is heavily influenced by tides. On incoming tides, bait often pushes onto the flats or into creeks to feed. On outgoing tides, they get flushed out, often congregating at the mouths of creeks, channels, or around points, making them easier to net. Strong tidal flows can concentrate bait, but they can also make it harder for your net to sink effectively if the current is too swift. Understanding Best Tides for Inshore Fishing in Florida will significantly improve your success. Early morning and late evening, or even night, are often the best times to find large schools of bait when predatory birds and fish aren't scattering them as much.
Table: Cast Netting Bait & Location Guide
| Bait Species | Common Net Mesh Size | Preferred Habitat & Location | Best Conditions |
|---|---|---|---|
| Pilchards (Whitebait) | 3/8", 1/2" | Grass flats, oyster bars, channel markers, docks | Calm mornings, outgoing/incoming tides, diving birds |
| Threadfin Herring | 3/8", 1/2" | Open water, near inlets, deep grass flats | Schools visible on surface, active feeding |
| Finger Mullet | 1/2" | Shallow estuaries, canals, beaches, mangrove lines | Jumping mullet, nervous water, higher tides |
| Pinfish | 3/8", 1/2" | Docks, pilings, grass flats, rocky areas | Anytime near structure, chumming helps |
| Live Shrimp | 1/4", 3/8" | Shallow grass, oyster beds, dock lights (night) | Night around lights, low current, calm water |
Remember to always be aware of local Florida Fishing Regulations and Bag Limits, which can sometimes include rules for baitfish. While less common, there might be specific areas where cast netting is restricted. Make sure you're familiar with regulations, especially regarding Do You Need a License to Cast Net in Florida?.
Care and Maintenance of Your Cast Net
You've invested time and effort into learning how to cast net and even more into catching that precious live bait. Now, you want your net to last, right? Neglecting your cast net can lead to tangles, tears, and a significantly shortened lifespan. A little post-trip care goes a long way.
Rinsing and Drying Your Net
This is perhaps the most crucial step in cast net maintenance, especially in saltwater environments. Saltwater is highly corrosive and will degrade your net's material over time if not properly removed.
- Immediate Rinse: As soon as you're done fishing, give your net a thorough rinse with fresh water. If you're on the boat, a quick spray with a hose is better than nothing. When you get home, ideally, soak the net in a large bucket or tub of fresh water for 15-30 minutes to dissolve any stubborn salt crystals, then rinse again under running water. Pay extra attention to the lead line and the braille lines, as salt can really build up here.
- Thorough Drying: After rinsing, the net must be dried completely before storage. Hanging it up in a shaded, well-ventilated area is best. Direct sunlight can degrade monofilament over time, making it brittle, so try to avoid prolonged exposure. You can hang it from a clothesline, a tree branch, or even a shower curtain rod if you have a large enough space. Make sure the net is spread out as much as possible to allow air circulation. If you store a damp net, it will quickly develop mildew, rot, and an unpleasant smell, rendering it useless.
Storing Your Net Properly
Once your net is completely dry, proper storage will prevent tangles and damage.
- Folding/Flaking: Don't just wad it up! Learn to flake your net properly into a bucket or a dedicated net bag. This means neatly laying the net in layers, ensuring the lead line is coiled at the top and the braille lines are straight. There are many ways to do this, but the goal is to keep it organized so it's ready for your next throw without a frustrating untangling session.
- Dedicated Storage: A five-gallon bucket is a classic choice for cast net storage. You can coil the lead line around the bottom, then layer the net on top. Some anglers prefer specialized mesh net bags, often available on Amazon, which allow for better air circulation and drainage, but still require proper flaking to prevent tangles.
- Out of Sunlight: Always store your net out of direct sunlight and extreme temperatures. A garage, shed, or a boat locker are ideal spots. UV radiation is the enemy of most fishing lines and net materials.
Repairing Minor Tears and Lead Line Damage
Even with the best care, snags and tears happen, especially when throwing near structure like oyster bars or docks. Don't throw out a perfectly good net for a small tear!
- Repair Kits: Many tackle shops and online retailers sell cast net repair kits, which typically include extra mesh material, a netting needle, and monofilament line.
- Small Tears: For small holes, you can often simply knot the broken strands back together. Use a square knot or a surgeon's knot for strength.
- Larger Tears: For bigger tears, you might need to cut out a patch from the repair mesh and weave it into the damaged area using a netting needle and appropriate knots. YouTube is a fantastic resource for visual tutorials on cast net repair. It takes a bit of patience, but it's a valuable skill that will extend the life of your investment.
- Lead Line Damage: If a section of your lead line gets kinked or broken, you can often cut out the damaged section and re-splice it with new lead line, crimps, or strong knots. Ensuring the lead line is perfectly circular is key for a good throw.
Regular inspection of your net will help you catch minor issues before they become major problems. Check the braille lines for fraying and the mesh for small holes after each use. A well-maintained net is a reliable net, and in the world of Florida fishing, reliable live bait is often the difference between a good day and a truly epic one.
Disclaimer
Fishing regulations, including those pertaining to cast nets and baitfish, can change. Always consult the latest rules and guidelines from the Florida Fish and Wildlife Conservation Commission (FWC) before heading out. This guide is for informational purposes only and does not supersede official regulations.